
PDF
Teilnahmebedingungen Gewinnspiel – Coloplast Adventskalender
PDF
6MB
6
pages
By following the steps in this pathway, you can provide an optimal healing environment for diabetic foot ulcers and reduce the risk of complications that could lead to delayed healing or worse.
Any advice included here needs to work in conjunction with your local protocols and your individual scope of practice.
This article is based on the book A pathway for treating a person with a: Diabetic foot ulcer.
Diabetic foot ulcers are among the most common complications of patients diagnosed with diabetes mellitus. They are usually accompanied by neuropathy and/or peripheral arterial disease (PAD) in the lower extremity.1
A diabetic foot ulcer under the foot
A diabetic foot ulcer under the foot
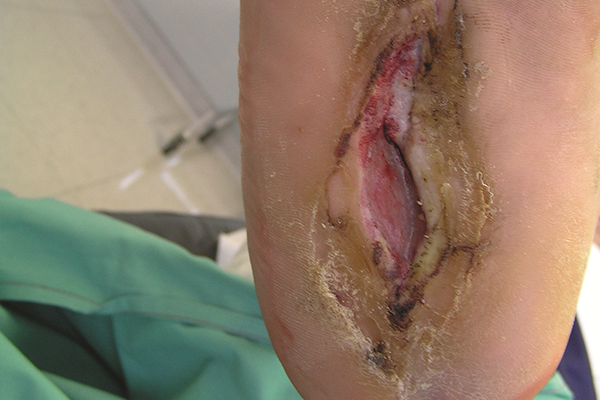
A diabetic foot ulcer under the heel
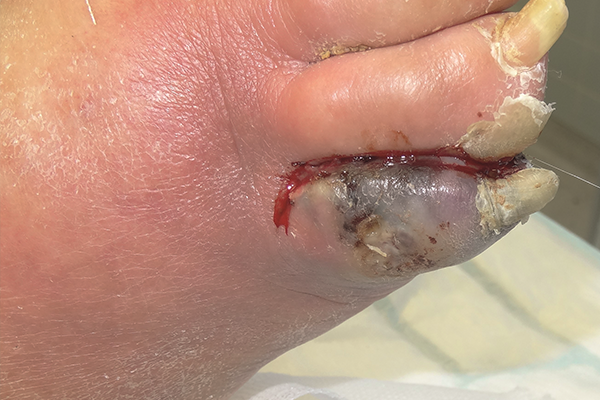
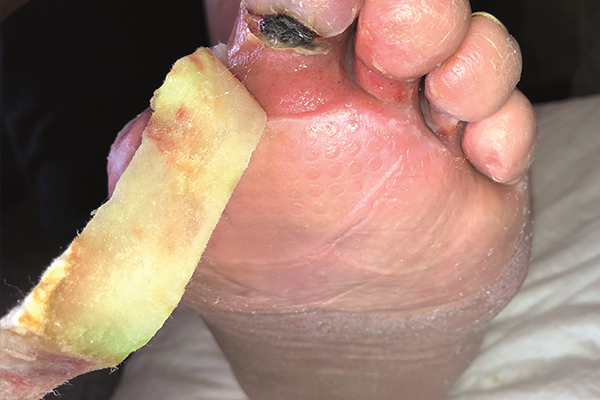
A diabetic foot ulcer under the toe
Learn more about the typical features of DFUs according to aetiology.
That a person with diabetes may have all three types of peripheral neuropathy, and each can be a contributing factor to ulceration:
Sensory neuropathy – leading to unrecognized trauma (most common)
Motor neuropathy metatarsal – leading to foot deformities particularly the cocked-up toe deformity with met head prominence.
Autonomic neuropathy – leading to decreased sweating and skin fragility
Not all peripheral neuropathy is caused by diabetes. If the person with neuropathy does not have diabetes, they should be investigated for other causes (i.e. infection, cancers, nutrition or vitamin deficiencies, etc.)
The guidance provided in this Wound Type Specific Pathway, is best understood in combination with the detailed guidance available to you in The Wound Care Pathway.
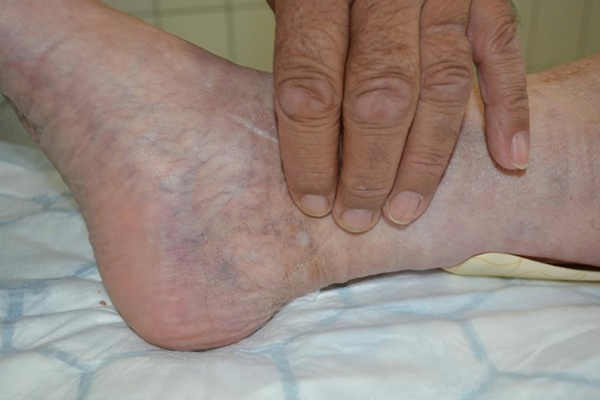
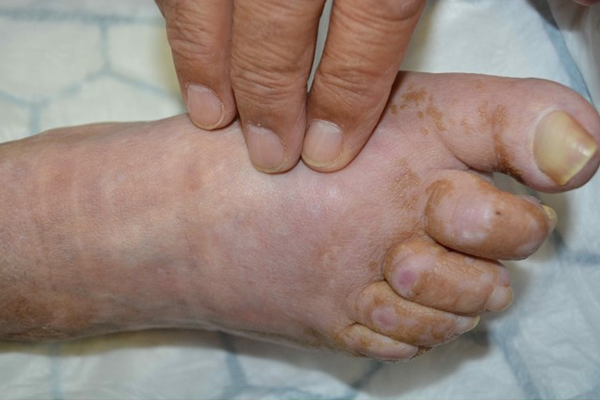
➔ Always check for skin and nail changes as you begin your patient and wound assessment.
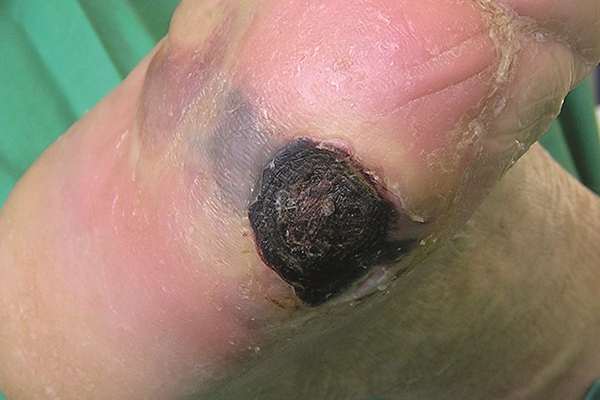
➔ When dealing with patients with dark skin tones, take extra care to ensure that eschar or necrosis are correctly diagnosed.
➔ Look out for potential infection, by comparing one foot with the other if possible and check for differences in warmth and texture. 2

Infected diabetic foot ulcer on the foot

Infected diabetic foot ulcer with necrosis present
➔ Use a monofilament test to conduct a sensory assessment. If you don’t have equipment at your disposal, use the Ipswich touch test: Ask your patient to close their eyes and apply fingertip.
➔ For your vascular assessment locate pulse at multiple locations (leg, ankle and foot): femoral, popliteal, posterior tibial and pedal
➔ Assess for temperature differences between foot and calf or between right and left foot using the back of your fingers.
If you find no pulse in either location on the foot, or other places, you should always refer to a specialist. In case you detect abnormalities, consider conducting a Buerger and finger pressure test, and immediately escalate to a specialist if abnormalities persist.
Pulse palpation on different locations
That due to the presence of arterial calcification in diabetic patients, toe pressure may be a more accurate indicator of peripheral arterial disease (PAD) than ABPI – which is otherwise the gold standard for diagnosing peripheral arterial disease.
➔ For a musculoskeletal assessment, first identify the location of the ulcer. Look for areas of pressure or deformity. Is the midfoot hot, red or swollen? Assess range of motion of joints, especially the ankle and the big toe. Then, assess for pain.
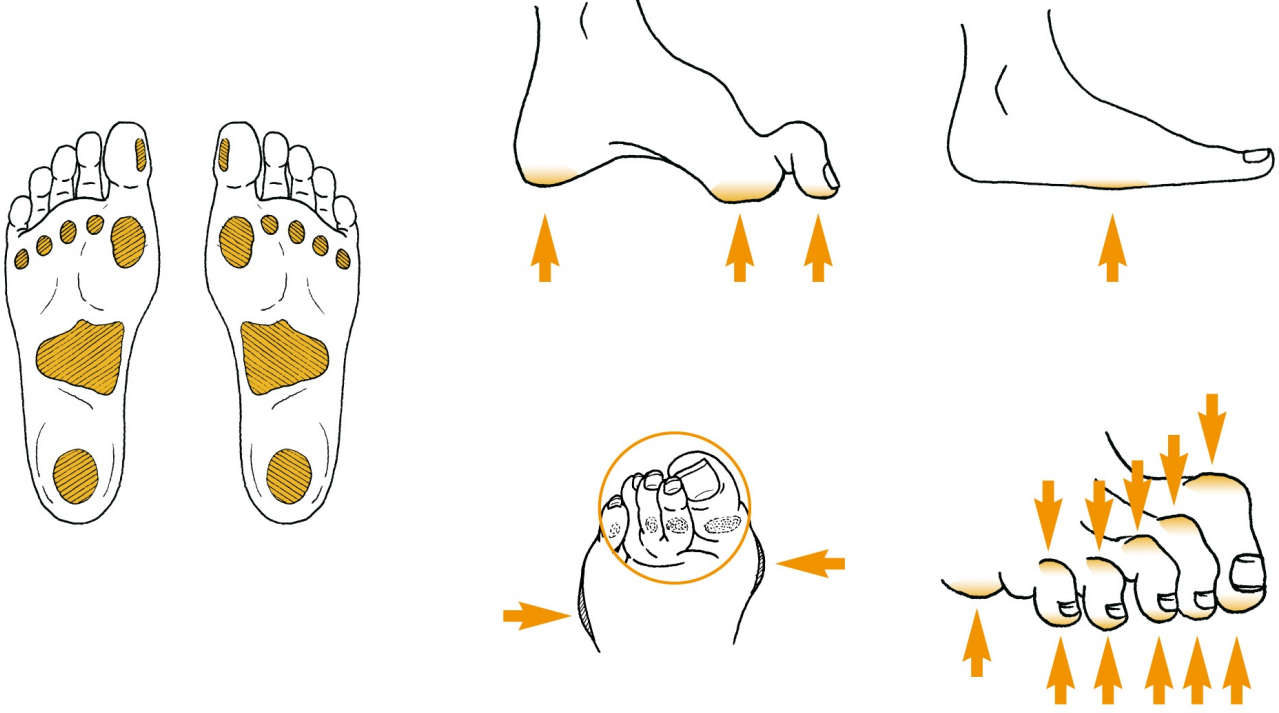
IWGDF Practical Guidelines: Areas of the foot at highest risk for ulceration
Finally, use a validated assessment tool like the Triangle of Wound Assessment to make your wound assessment.
➔ First, classify the wound using a validated diabetic foot ulcer classification system like SINBAD , TEXAS or WiFi – and ensure that all members of the care team always use the same system including informal caregivers (i.e. family members).
When dealing with a diabetic foot ulcer, always conduct a holistic patient assessment that looks at the diabetic triad: lifestyle, nutrition, glycemic control.
➔ Then, determine if the wound is healable, non-healing, or non-healable.
➔ Since several individual patient factors can directly affect the healing process of a diabetic foot ulcer, you must take these into consideration when you determine your treatment and care plan:
That the underlying cause(s) of diabetic foot ulcers can have a significant bearing on the clinical management and must be determined before a care plan is put in place. 4
➔ Your treatment and care plan should reflect a holistic care team approach. Cooperation and communication among the diabetes care team allows for more timely removal of factors that negatively affect the healing of a diabetic foot.
➔ Since poor glycemic control is associated with poor wound healing, patients should be encouraged to maintain good glycemic control (HbA1c should be below 7.5% and as close to 6.5% as possible). However, tight glycemic control, may have adverse effects in older patients so it is important to work with the care team to determine the best glycemic control plan for each individual patient.
Discover HEAL, our free online medical education programme supporting clinicians who are managing wounds and skin care complications. To provide you with credible and non-biased education, the HEAL programme is authored by internationally renowned wound care experts and endorsed by local wound care associations.
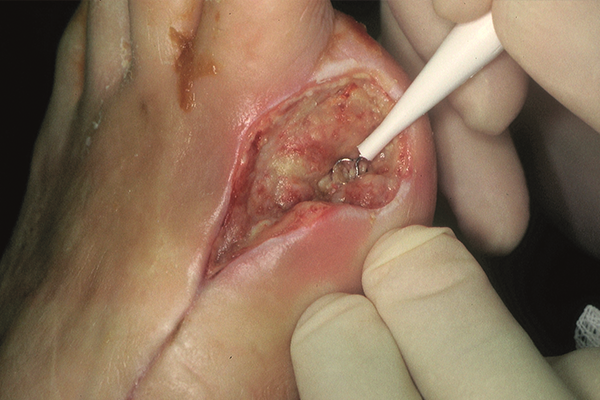
➔ First, cleanse the wound using non-irritating cleansers such as potable water, normal sailine or wound cleansers.
➔ Debride the wound of non-viable tissue, including peri-ulcer calluses.
➔ Choose sharp debridement to remove slough, necrotic tissue and surrounding callus of the diabetic foot ulcer – if it is preferable to other methods, when you take contra-indications such as pain or severe ischemia into account. 5
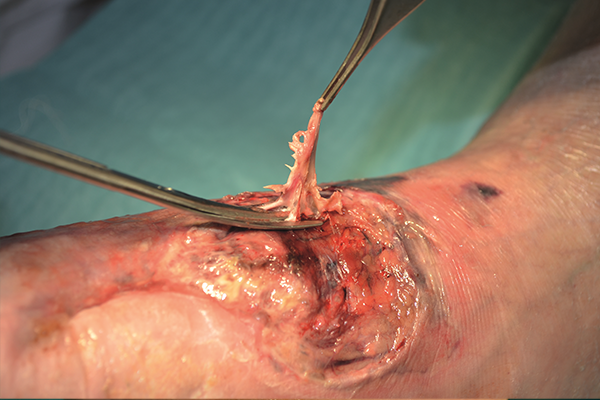
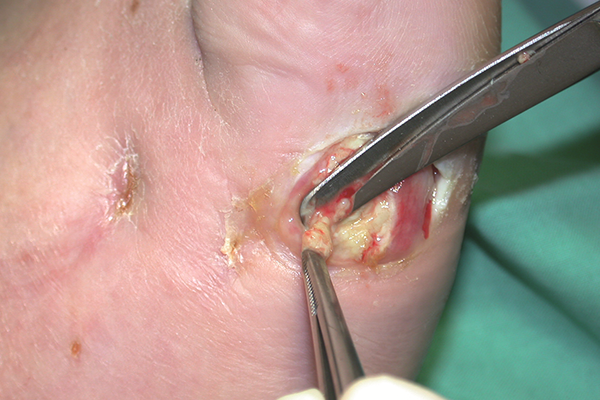
Debridement methods
Debridement should be done by trained HCP/consistent with scope of practice.
➔ The key to healing a diabetic foot ulcer is to relieve presure on the foot. That’s why off-loading is key to healing.
➔ Encourage the use of specialized shoes, and let your patient know that a diabetic foot ulcer needs to be managed even after it is closed, requiring continued monitoring and life-long off-loading.
Local management of DFUs (PDF, 6 MP, Page 3)
Guidelines on offloading foot ulcers in persons with diabetes (PDF, 6MB 18 pages)
➔ To ensure the optimal healing environment, choose a dressing that promotes healing by helping you manage moisture balance and bioburden in the wound while protecting the periwound skin.
➔ Make sure that the dressing you choose can conform to the wound. It should leave no gap between dressing and wound bed – either by itself or in combination – in order to effectively manage exudate and bacterial balance.
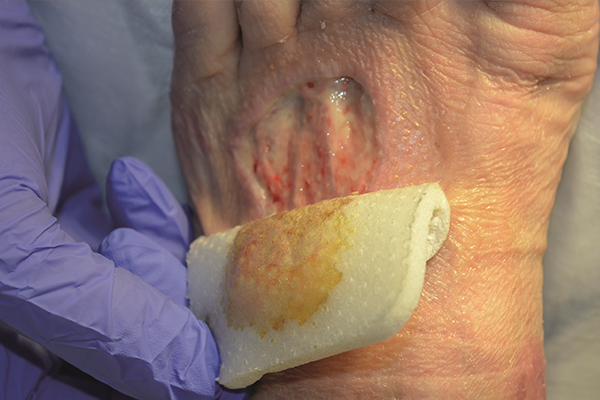
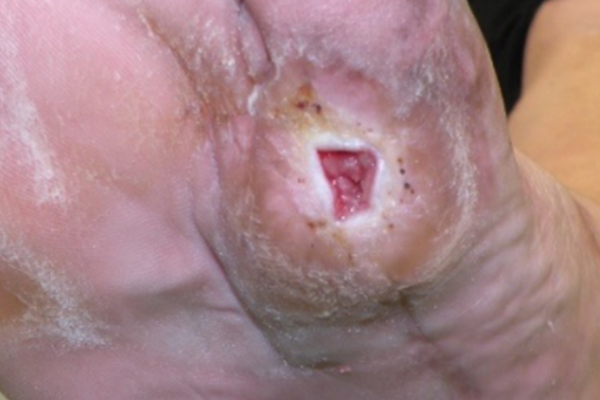
The dressing should conform to the wound bed leaving no gap between dressing and wound

A woundbed conforming dressing used on a heel
Gelling fiber dressing can be used to fill the cavity and close the gap
That choosing the right dressing is important, but it is only one part of the healing regime. When it comes to diabetic foot ulcers relieving pressure from the foot is key and focus must be on managing ischemia and infection.
➔ Reach out to your holistic care team if you see the need for additional therapies. A Gait analysis, endocrinology and a nutritional approach should be considered.
➔ Monitor changes in wound size, as a lack of change may indicate that healing is stalled. A reduction in wound area of 10-15% per week or over 50% after four weeks of treatment predicts wound healing. 3
➔ Regular foot inspections are critical. You should look for pre-ulcerist lesions and calluses.
That diabetic foot ulcers must be subject to ongoing review: Regularly by the patient and periodically by a professional.
➔ Make your patients understand:
➔ Educate the patient on self care and early warning signs.
– a group of diseases that affect how the body uses blood sugar (glucose).
– narrowing or blockage of the vessels that carry blood from the heart to the legs.
– lack of blood supply to a certain part of the body, which may cause tissue damage due to lack of oxygen and nutrients.
– a two stage test designed to assess the adequacy of the arterial supply to the leg. With the patient supine, elevate both legs to an angle of 45 degrees and hold for one to two minutes. Observe the colour of the feet. (Pallor indicates ischaemia) Then sit the patient up and ask them to hang their legs down over the side of the bed at an angle of 90 degrees. In an ischemic leg the skin at first becomes blue, as blood is deoxygenated in its passage through the ischaemic tissue, and then red, due to reactive hyperaemia from post-hypoxic vasodilatation.
For a glossary of general wound care terms consult The Wound Care Pathway: