
Get full access with a free account
Benefits of the Coloplast® Professional Educational platform
Get full access to all educational content, events and resources
Track your progress
Share content with your collegues
Share supporting material with your patient
Pressure injuries and risk prevention
How to protect the skin
Maintaining skin integrity is the key to protecting the skin against pressure injuries. This is especially important in patients with incontinence. When urine and/or stool gets on the skin, it can increase the risk of a pressure injury developing.1
If you have a patient with incontinence, you should follow this three-step routine after each incontinence episode:
Step 1: Cleanse
Cleanse the skin with a pH-balanced cleanser. This will maintain the skin’s acid mantle.
Step 2: Moisturise
Consider using a skin moisturiser to hydrate the skin.
Step 3: Protect
Use a moisture barrier to protect the skin from urine, stool and excessive moisture.2
TIP: Use low-friction textiles
Studies show that silk-like fabrics reduce shear stress, minimise skin irritation and dry more quickly than cotton or cotton-blend fabrics. Patients placed on silk-like fabric sheets also have fewer pressure injuries than ones on standard cotton sheets.1
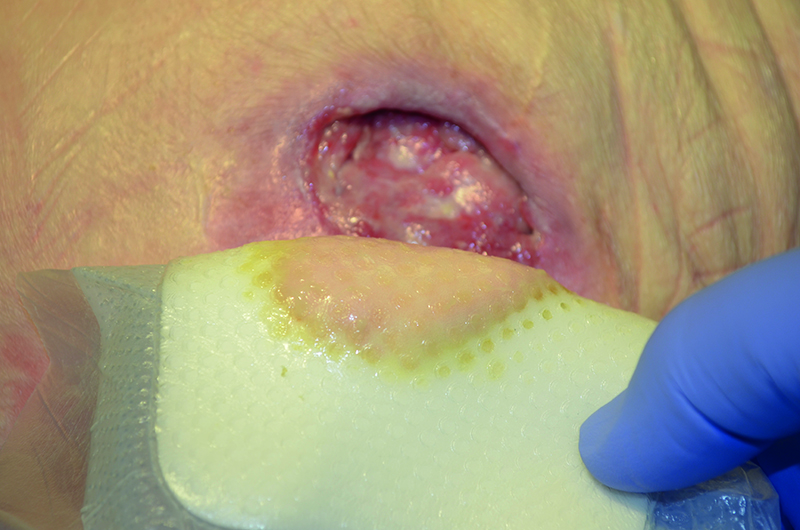
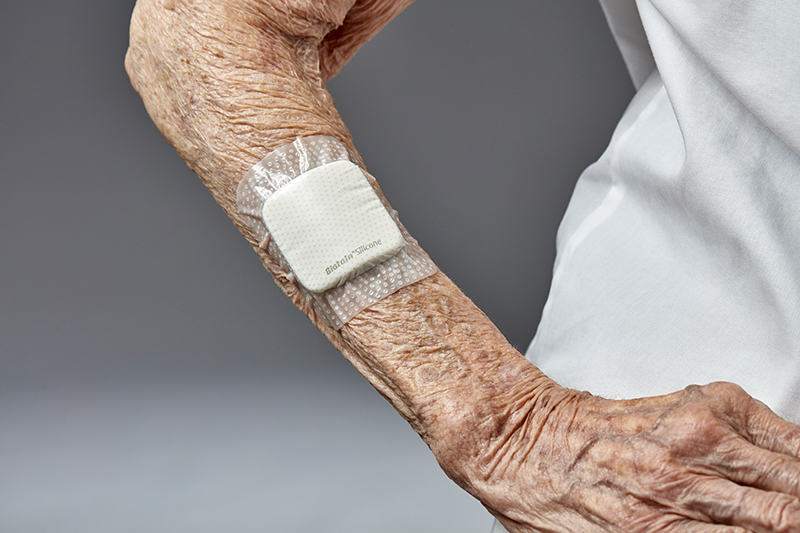
How to use protective dressings
Studiesshow that using a multi-layer silicone foam dressing can protect the skin and prevent pressure injuries.
To choose the right dressing, ask yourself the following questions:
- Is it the right size and design?
- Does it manage the skin’s microclimate, e.g. moisture?
- Is it easy to put on and take off?
- Will it stay in place?
- Does it allow me to regularly assess the skin underneath the dressing?
- Is it comfortable and hypo-allergenic?
- Is it cost-effective and easy-to-access?
If you decide to use a protective dressing, you should:
- continue to reposition your patient regularly;
- assess the skin beneath the dressing at least once a day;
- change the dressing if it is dirty or excessively moist, or if it loosens or gets out of place.
How to use repositioning
Patients who can’t move on their own are more likely to develop pressure injuries. When the body lies or sits in one position for an extended period of time, this places pressure on certain parts of the body. If a person doesn’t change position regularly, this pressure can damage the skin and underlying tissues, forming a pressure injury.1
For this reason, an important part of preventing pressure injuries is repositioning or mobilising your patient.1,3
The goal of repositioning is to:
- reduce the amount of pressure placed on vulnerable areas of your patient’s body, and
- reduce the length of time pressure is placed on these areas.
Tips for repositioning
When you’re choosing a position for your patient, be sure to assess whether the position actually relieves pressure on vulnerable areas.
Watch this video to see the correct way to reposition.
|
Do:1 |
Don’t1 |
|
Use manual techniques and equipment to reduce friction and shear |
Position on bony prominences (places where the bone is close to the surface of the skin) or medical devices. |
|
Keep the head of the bed as flat as possible. |
Leave moving and handling equipment under your patient. |
|
Find alternatives to sitting in bed, such as during mealtimes. |
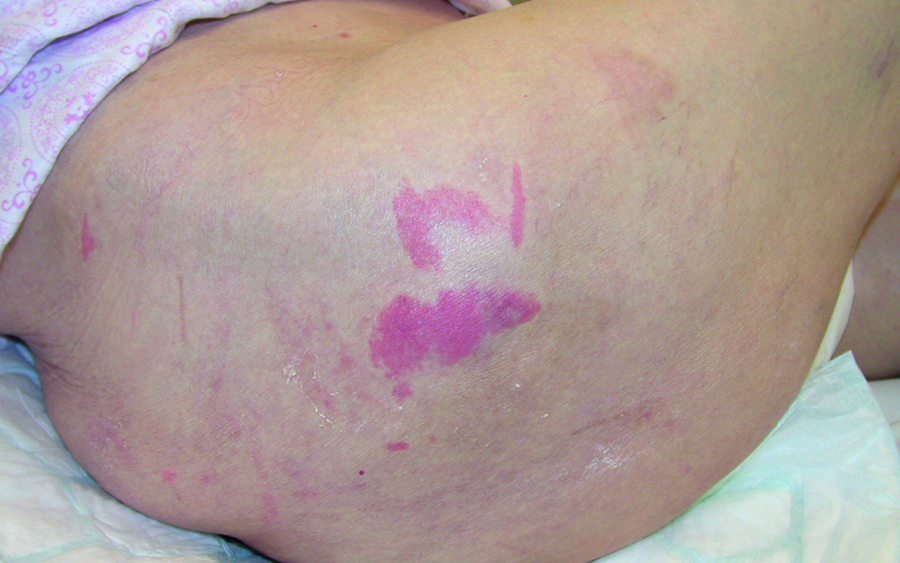
Turn the patient onto a body surface that is still red from a previous episode of pressure loading. |
|
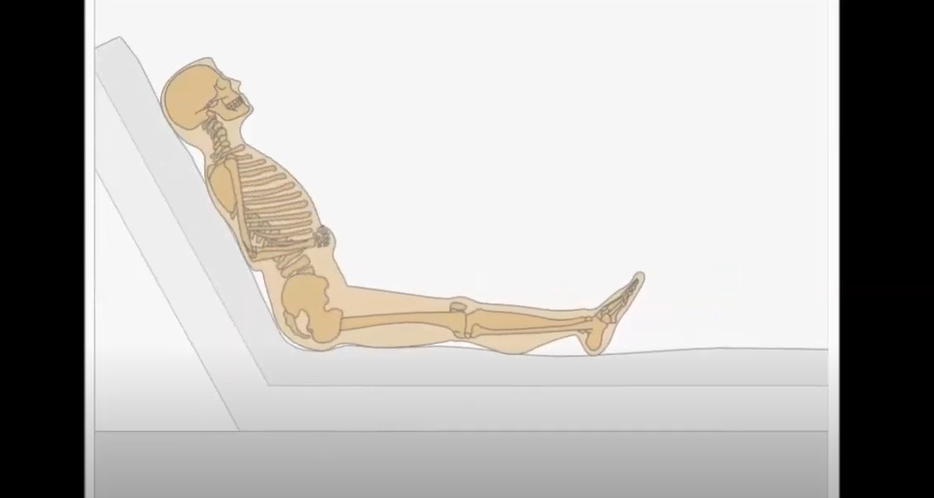
Use a 30-degree side-lying position (see image 1) |
Rub any reddened areas of the skin. This can increase the risk of a pressure injury. |

Image 1:
Guidelines recommend using a 30-degree side-lying position, as shown in this image
If your patient is in a wheelchair, keep the following in mind:
- Try to limit the time the patient spends sitting to 60 minutes or less
- Try to shift the patient from time to time. For example, by tilting them forward or using a lift-off
- Choose a reclined seated position where the legs are elevated
- Make sure your patient’s feet are well-supported so they don’t slide when the patient is sitting upright in a chair or wheelchair
How often should I reposition?
To find out how often you should reposition a patient, you need to start with a pressure injury risk assessment. Pay particular attention to how active and mobile your patient is. This is important because the less active and mobile a person is, the greater the risk of a pressure injury.1
Consider the following factors when planning your repositioning schedule:
- What is the condition of the patient’s skin?
- How tolerant is the skin and tissue (i.e. how well can they cope with pressure)?
- What is the patient’s overall medical condition?
- What are my overall treatment objectives?1
Keep in mind that you should reposition your patient throughout the day. Be sure to clearly document each time you do it.3
TIP: Try a 2-hour schedule as a starting point.3
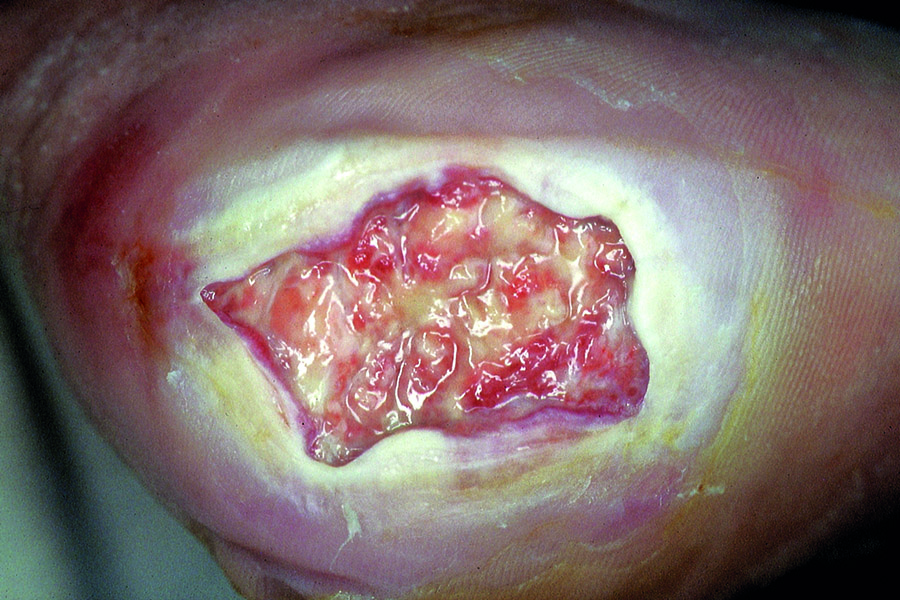
How to prevent pressure injuries around the heel
If your assessment shows that your patient is at risk of a heel pressure injury, you should elevate the heel. To do so, use a heel suspension device or a pillow or foam cushion. The device or cushion should be specifically designed for the heel.
The suspension device will help to distribute the leg’s weight along the calf, without placing pressure on the Achilles tendon.
Make sure that:
- the heels are free from the bed surface;
- the knees are slightly flexed (5-10 degrees); and
- pressure is distributed along the full length of the calves.
Did you know?
Almost 80% of all Stage 4 pressure injuries are located on the heel and sacrum.
References
- European Pressure Ulcer Advisory Panel, National Pressure Injury Advisory Panel and Pan Pacific Pressure Injury Alliance (2019). Prevention and Treatment of Pressure Ulcers/Injuries: Clinical Practice Guidelines. The International Guideline. Emily Haesler (Ed.). EPUAP/NPIAP/PPPIA.
- Lyder, C. H., Ayello, E. A. (2008). Chapter 12: Pressure Ulcers: A Patient Safety Issue. In Huges, R. G. (Editor) Patient Safety and Quality: An Evidence-Based Handbook for Nurses.
- Woo, K. Y., Van Den Kerkhof, E. Jimenez, C. (2016). Chapter 1: Quality of Life and Chronic Wound Care. In Baranoski, S., Ayello, E. A. (Editor), Wound Care Essentials – Practice Principles. 4th edition. Wolters Kluwer: Philadelphia.
You may also be interested in…
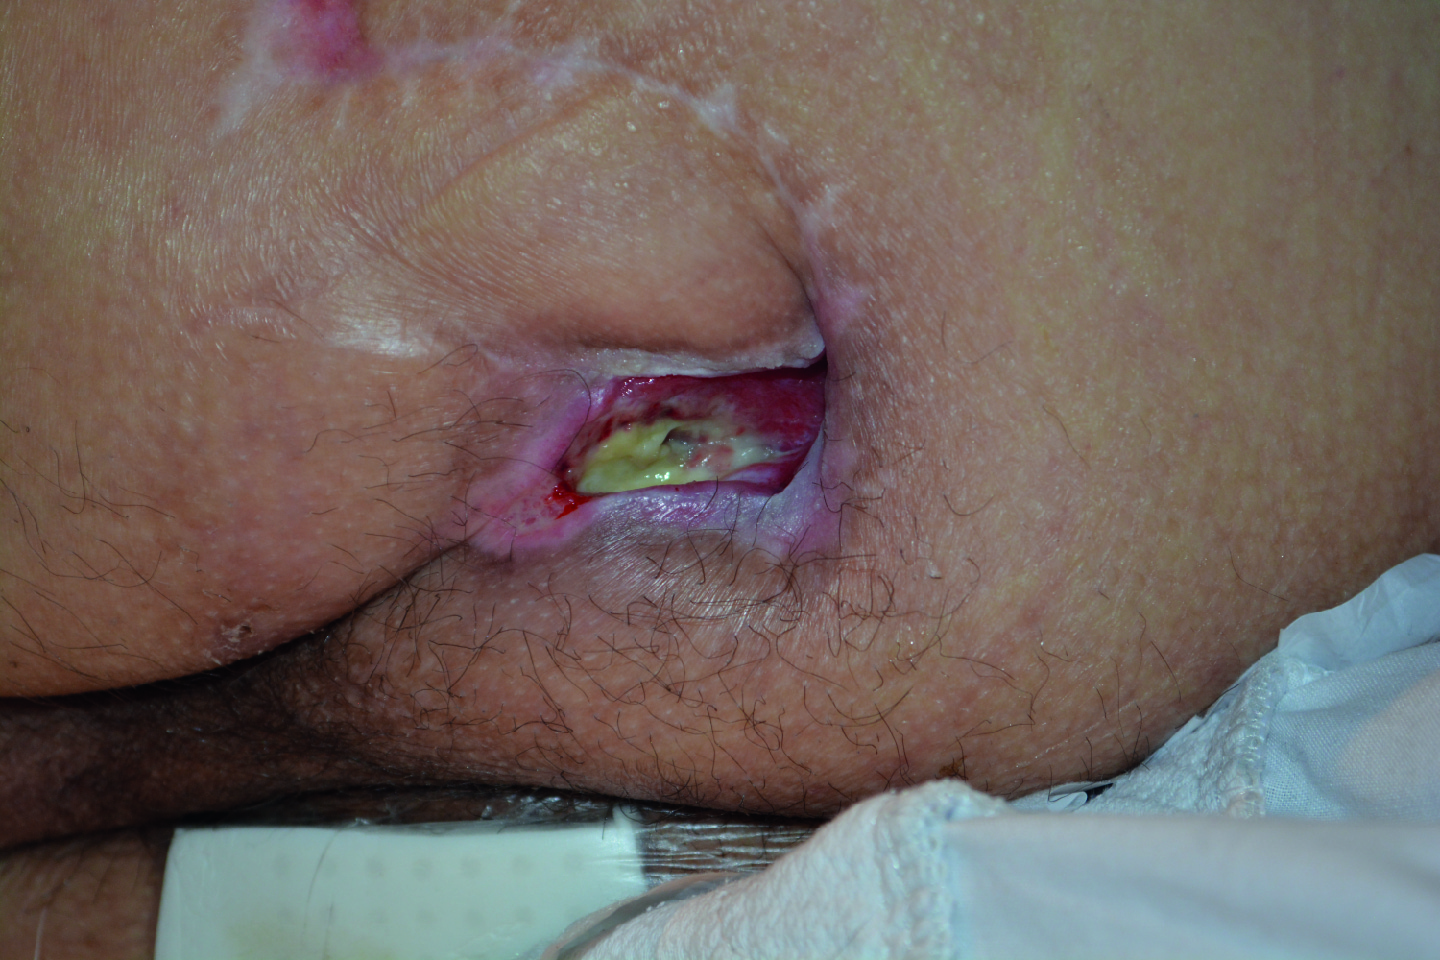
Patient case video
Watch how a recurring pressure ulcer was managed with a silicone foam dressing
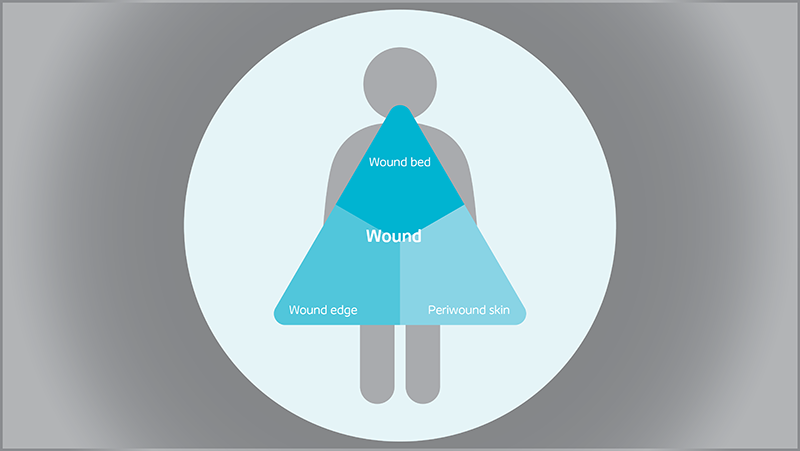
Triangle of Wound Assessment
Conduct a holistic and systematic wound assessment with our tool.